How to Turn a Photo into a Stencil
Use a clear source photo, adjust the two main controls, and make a test print. This guide follows the controls currently available in the generator.
1. Choose a suitable image
Start with a sharp, well-lit subject against a simple background. A portrait with clear separation between face, hair, and background is easier to simplify than a busy scene. Crop out distractions in an image editor first; this tool does not include a crop control.
JPG and PNG are good starting formats. Other formats depend on browser decoding, and animated images are not converted into animated stencils. Pixel dimensions, not just file size or a DPI label, determine processing work. Uploads are limited to 20 MB. Images with a longest edge above 1500 pixels are resized before processing; the displayed output dimensions also apply to downloads.
2. Upload and wait for the preview
Open the generator, select your image, and wait for the processed preview. Uploading computes recommended settings from image statistics. This is local image processing, not a generative AI model.
Your image is not uploaded by the conversion code. The website does load separate analytics and advertising scripts; read the Privacy Policy for details.
3. Adjust edge strength and threshold
Try edge strength 0.5 and threshold 130 as a comparison point, then change one control at a time. Edge strength adjusts edge enhancement. Threshold participates in local thresholding; its effect depends on the image and the cleanup steps, so avoid assuming every increase makes every result bolder.
Use small changes, wait for processing to finish, and inspect eyes, lettering, or other important features. The tool does not have separate contrast, brightness, or zoom controls. You can use your browser zoom or inspect the downloaded PNG in an image viewer.
A reproducible settings comparison
These outputs were generated from the existing site demo image using the processing functions in this version of the generator. Both use a black background and white foreground, without a material preset. They are examples, not guarantees for another photo. The landscape photograph belongs to the site maintainer. Its original 1706 × 1279 pixels are resized to 1500 × 1125 for these outputs.

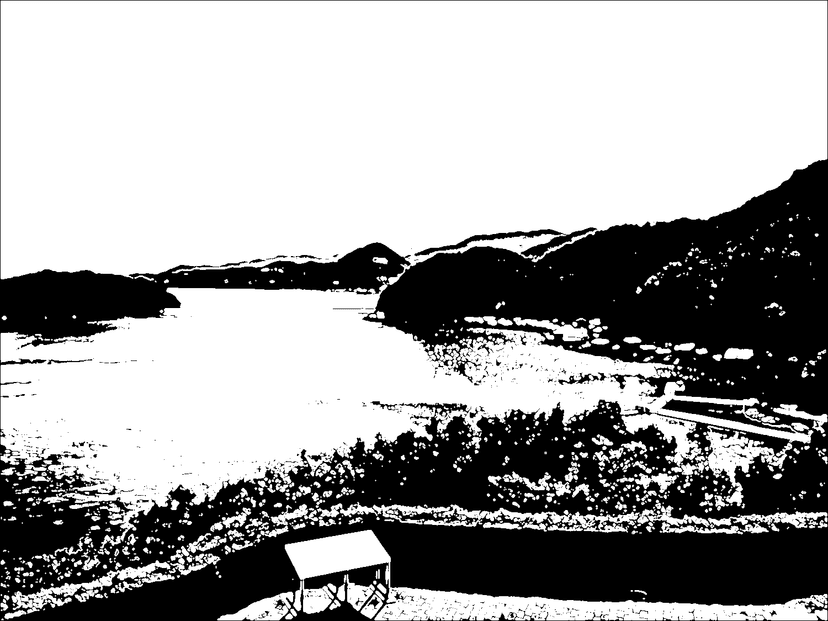
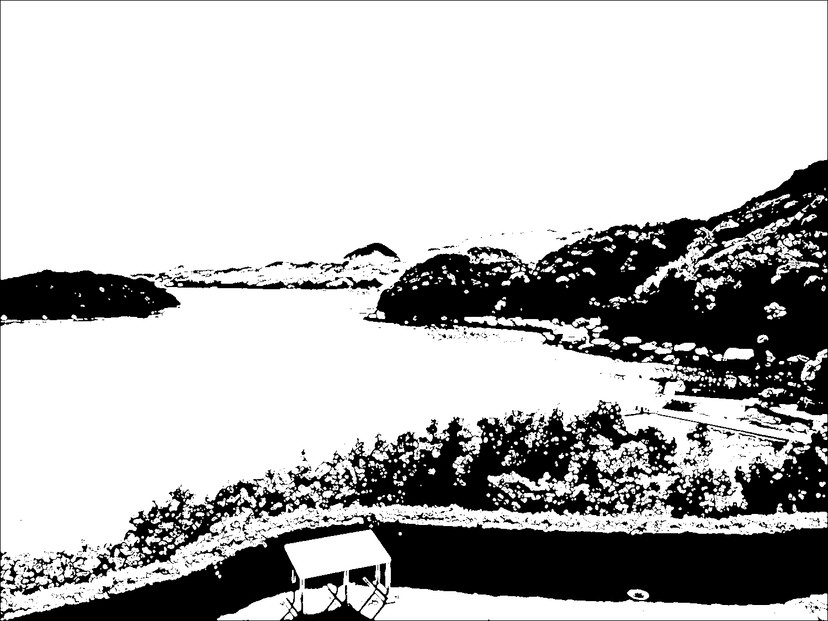
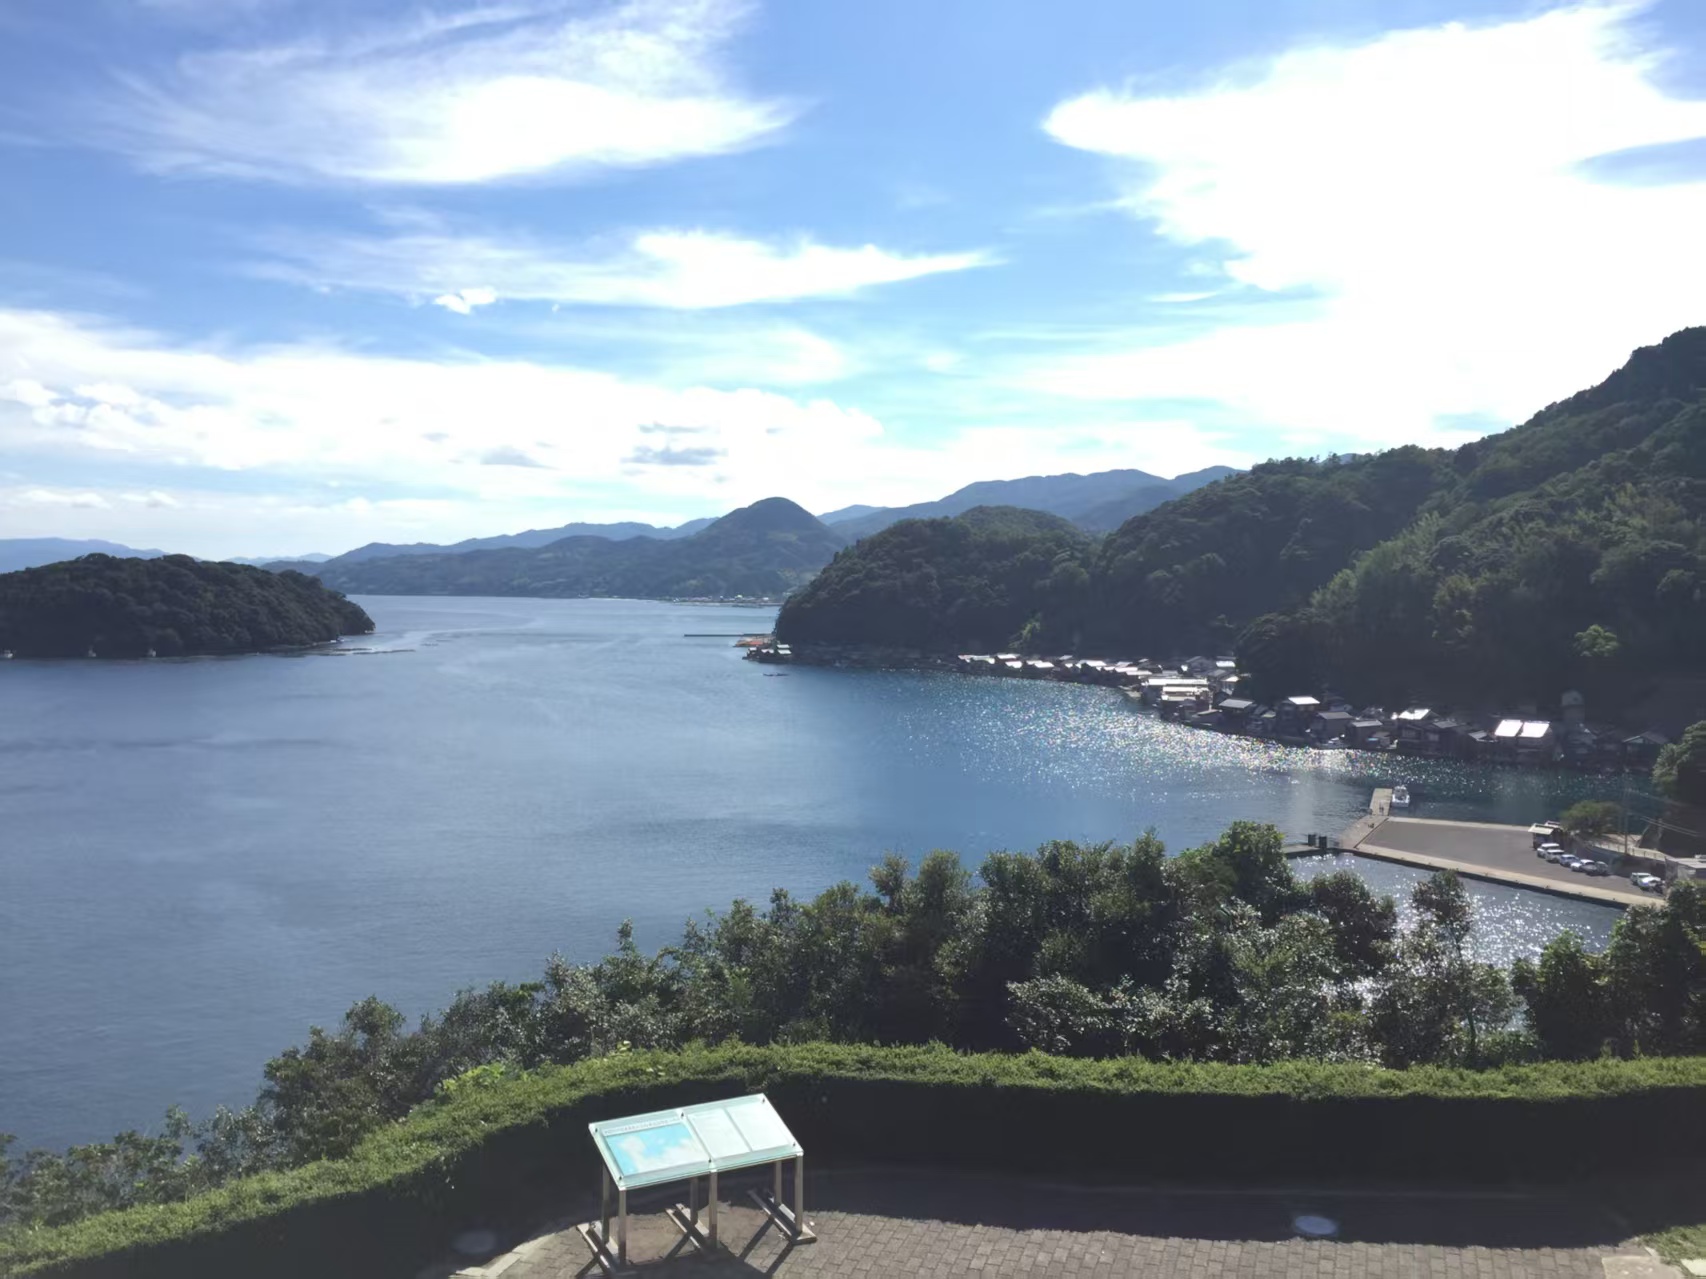
In this landscape, both settings preserve the main hill and roof shapes, but the 0.7 / 100 result has larger white regions on the right-hand hill and foreground. Both still contain many small specks in the vegetation. Those specks are a concrete reason not to call either result cut-ready: simplify the source or remove fragile details manually before cutting.
Upload the source image and set these values manually: uploading first applies automatically recommended settings. Wait for each preview to finish before changing another control. Compare at full size; small details that look good on screen may be too weak to cut.
4. Check the design as a physical stencil
A black-and-white image is not automatically a usable cutout. Decide which color represents material to keep and which represents openings. An enclosed island, such as the center of the letter O, needs a connection to the surrounding sheet if it is to remain in place.
Choose foreground and background colors for visibility, but do not treat color inversion as adding support. Add bridges manually in an editor when needed. Structure warnings are helpful prompts, not certification that the stencil will hold together.
5. Download PNG and print a test
Select PNG and download. Open the file in an image viewer and print a small test. Check the printed dimensions with a ruler; the generator does not set physical output size or provide a PDF export.
As a sizing example, a 1000-pixel-wide image printed 10 inches wide gives 100 pixels per inch. Enlarging the same file reduces effective print detail. Browser or system print-to-PDF is a separate print feature, not an export supplied by this tool.
Common failures and next steps
- Background overwhelms the subject: crop it out or choose a simpler photo before uploading.
- Small facial features disappear: compare a lower threshold and a modest edge-strength change. If the detail still cannot survive printing, simplify the design.
- Too many specks: reduce edge enhancement and compare threshold settings. Remove remaining noise manually.
- The page feels slow: reduce image dimensions before uploading. This version does not promise a fixed processing time.
- The print has floating pieces: add manual bridges before cutting, even if there are no warnings.
For material presets and SVG limitations, continue to the advanced settings guide.