Stencil Settings, Structure Warnings, and SVG
Learn what the presets actually change, what the warning system can detect, and how to review an export before cutting.
Material presets are starting points
Presets set edge strength and threshold; they do not configure a cutting machine or model physical material properties. Thickness, kerf, blade settings, and minimum bridge width are not measured by the generator.
| Preset | Edge strength | Threshold |
|---|---|---|
| Laser Cutting | 0.3 | 120 |
| Vinyl Cutting | 0.4 | 140 |
| Paper/Cardboard | 0.6 | 110 |
| Screen Printing | 0.5 | 130 |
| Tattoo Stencils | 0.7 | 100 |
| Wall Art | 0.4 | 150 |
Choose a preset, wait for processing, and tune one setting at a time. A preset name does not guarantee suitability for that application, including tattoos.
A reproducible settings comparison
These outputs were generated from the existing site demo image using the processing functions in this version of the generator. Both use a black background and white foreground, without a material preset. They are examples, not guarantees for another photo. The landscape photograph belongs to the site maintainer. Its original 1706 × 1279 pixels are resized to 1500 × 1125 for these outputs.

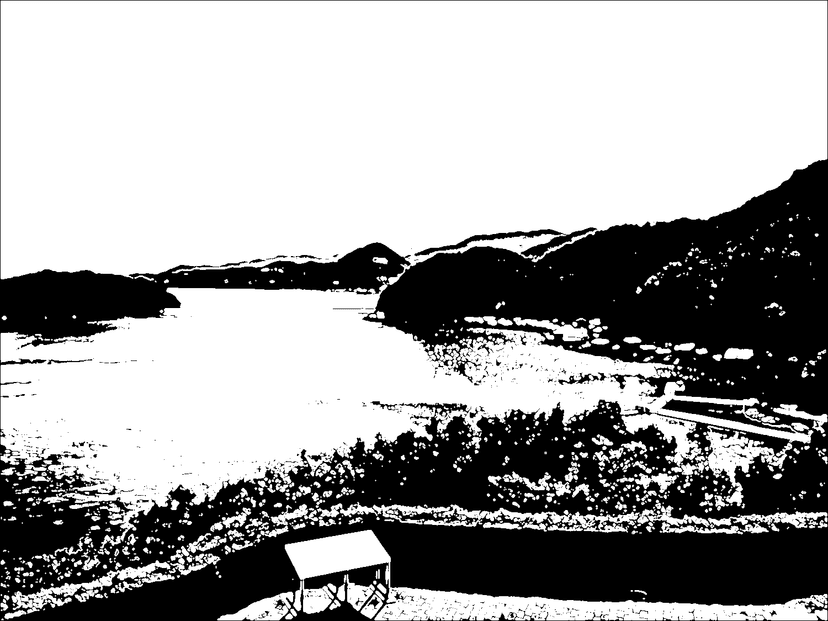
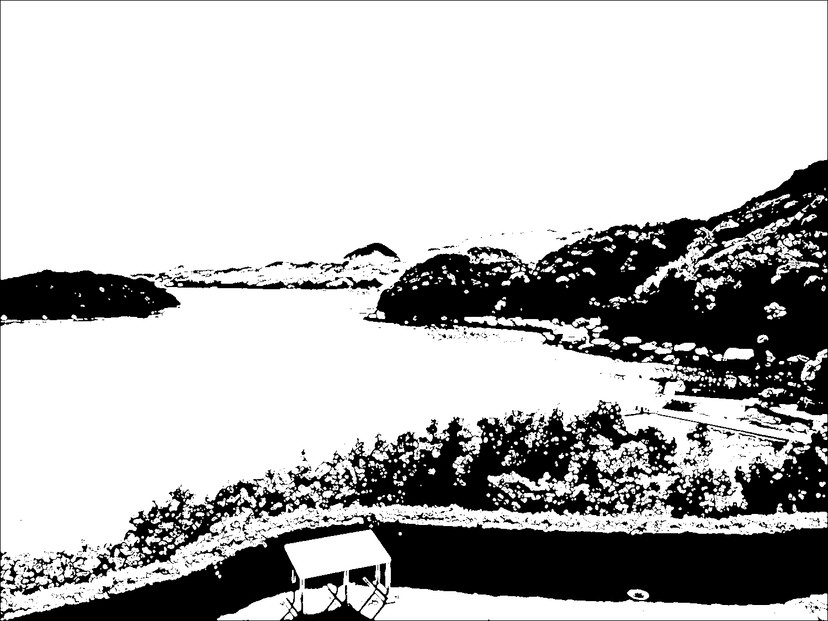
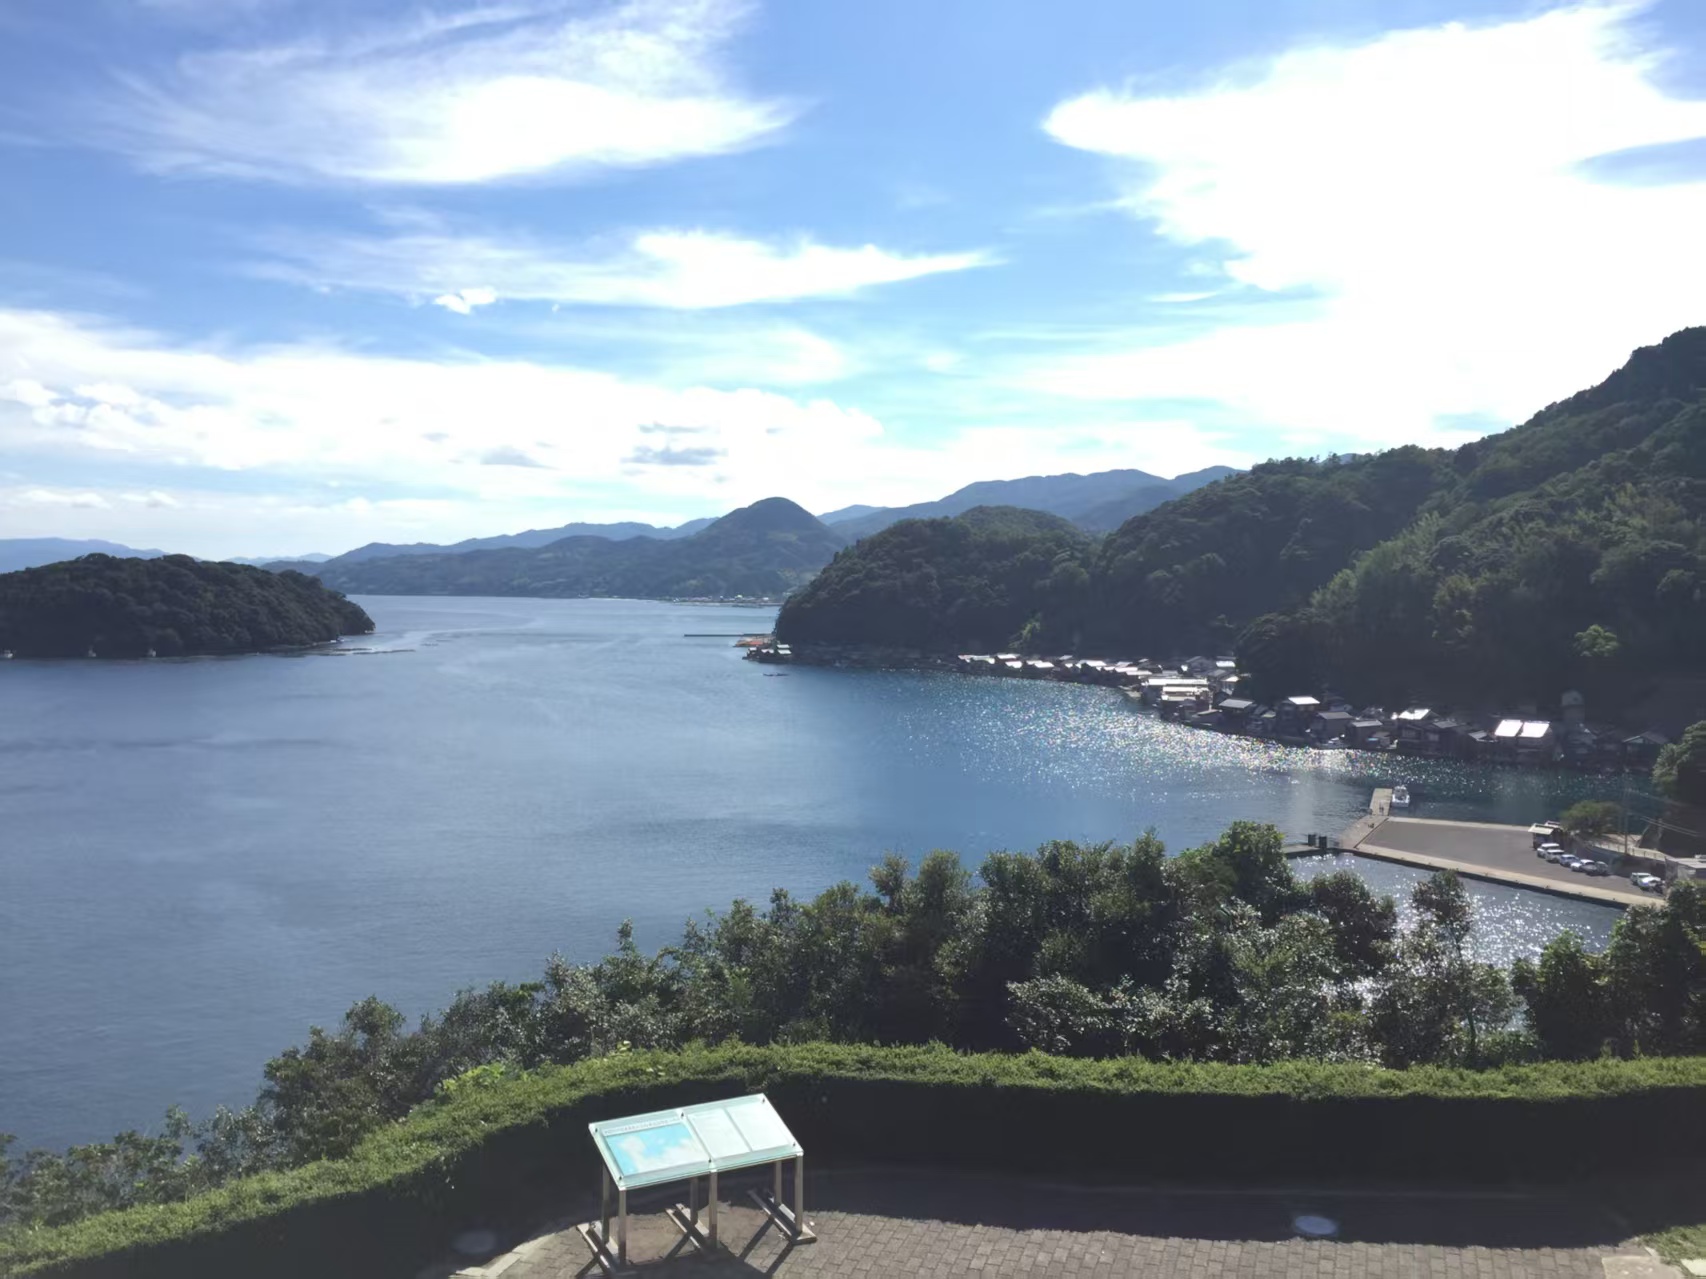
In this landscape, both settings preserve the main hill and roof shapes, but the 0.7 / 100 result has larger white regions on the right-hand hill and foreground. Both still contain many small specks in the vegetation. Those specks are a concrete reason not to call either result cut-ready: simplify the source or remove fragile details manually before cutting.
Upload the source image and set these values manually: uploading first applies automatically recommended settings. Wait for each preview to finish before changing another control. Compare at full size; small details that look good on screen may be too weak to cut.
What structure warnings actually check
The current analysis groups connected foreground pixels. It flags no detected elements, components smaller than 10 pixels, more than 50 separate components, and solid components covering over 30% of the image.
These pixel-based heuristics do not measure strength in millimeters, identify every enclosed island, or create bridges. Resizing a source can change the warnings even when the physical design is similar. No warning does not mean safe or cut-ready.
Plan bridges manually
Imagine cutting away the intended openings. If a retained piece is surrounded by an opening, connect it to the sheet in a vector or raster editor. For example, the center of an O needs a bridge when cutting the surrounding ring. A preview cannot determine bridge width without knowing the printed scale and material.
Print the design on paper, mark every retained island, and add connections before cutting. Test on scrap material and follow your machine manufacturer's instructions. The generator does not automatically add bridges or separate multilayer designs.
PNG versus experimental SVG
PNG preserves the raster preview and is the most direct choice for a printed test. Experimental SVG export converts selected pixels into paths using a simple traversal, not a robust boundary-tracing algorithm.
In this implementation SVG pixel selection uses a brightness cutoff of 128 on the colored result. Dark foreground colors or a light background can therefore produce a different path selection than you expect. For evaluation, start with white foreground and black background, and compare the exported file to the PNG.
The SVG also contains a background rectangle. In a vector editor, inspect or remove that rectangle as appropriate and check for crossed paths, unnecessary nodes, missing holes, open-looking contours, and accidental fill regions. Set physical dimensions in your editor, not from the SVG pixel dimensions alone.
Do not send an unchecked SVG directly to a laser or vinyl cutter. If cleanup is extensive, use the PNG as a reference and trace a clean design in a dedicated editor. Cricut and Silhouette compatibility is not guaranteed. PDF export is not available.
A pre-cut checklist
- Record the source dimensions, edge strength, threshold, and colors; settings are not saved between sessions.
- Choose what stays and what is removed, then add any missing bridges manually.
- Inspect PNG and SVG at full size and compare their shapes.
- Set output dimensions and check minimum features for your material and equipment.
- Print a paper test, then test a small section on scrap material before committing to the full project.
If you are starting out, follow the photo-to-stencil walkthrough first.